CSS Lists
CSS Styling Lists
In HTML, there are two main types of lists:
- <ul> – unordered lists (list items are marked with bullets)
- <ol> – ordered lists (list items are marked with numbers or letters)
CSS has the following properties for styling HTML lists:
list-style-type– Specifies the type of list-item markerlist-style-image– Specifies an image as the list-item markerlist-style-position– Specifies the position of the list-item markerslist-style– A shorthand property for the properties above
CSS Style List-item Markers
The CSS list-style-type property specifies the type of list-item marker in a list.
The following example shows some of the available list-item markers:
Example:
|
1 2 3 4 5 6 7 8 9 10 11 12 13 14 15 16 17 18 19 20 21 22 23 24 25 26 27 28 29 30 31 32 33 34 35 36 37 38 39 40 41 42 43 44 45 46 47 48 49 50 51 52 53 54 55 56 57 58 59 60 61 62 63 64 |
<!DOCTYPE html> <html> <head> <style> ul.a {list-style-type: circle;} ul.b {list-style-type: disc;} ul.c {list-style-type: square;} ol.d {list-style-type: upper-roman;} ol.e {list-style-type: lower-roman;} ol.f {list-style-type: lower-alpha;} ol.g {list-style-type: decimal;} </style> </head> <body> <h2>The list-style-type Property</h2> <p>Example of unordered lists:</p> <ul class="a"> <li>Coffee</li> <li>Tea</li> <li>Coca Cola</li> </ul> <ul class="b"> <li>Coffee</li> <li>Tea</li> <li>Coca Cola</li> </ul> <ul class="c"> <li>Coffee</li> <li>Tea</li> <li>Coca Cola</li> </ul> <p>Example of ordered lists:</p> <ol class="d"> <li>Coffee</li> <li>Tea</li> <li>Coca Cola</li> </ol> <ol class="e"> <li>Coffee</li> <li>Tea</li> <li>Coca Cola</li> </ol> <ol class="f"> <li>Coffee</li> <li>Tea</li> <li>Coca Cola</li> </ol> <ol class="g"> <li>Coffee</li> <li>Tea</li> <li>Coca Cola</li> </ol> </body> </html> |
Result:
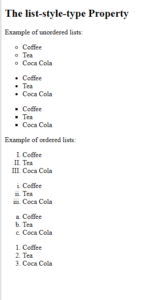
Note: Some of the values are for unordered lists, and some for ordered lists.
CSS Replace List-item Marker with an Image
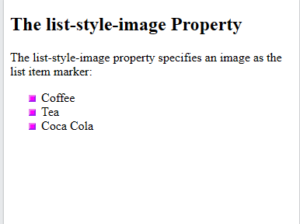
The CSS list-style-image property is used to replace the list-item marker with an image.
Note: Always specify a list-style-type property in addition. This property is used if the image for some reason is unavailable.
Example:
|
1 2 3 4 5 6 7 8 9 10 11 12 13 14 15 16 17 18 19 20 21 22 23 24 |
<!DOCTYPE html> <html> <head> <style> ul { list-style-image: url('sqpurple.gif'); list-style-type: square; } </style> </head> <body> <h2>The list-style-image Property</h2> <p>The list-style-image property specifies an image as the list item marker:</p> <ul> <li>Coffee</li> <li>Tea</li> <li>Coca Cola</li> </ul> </body> </html> |
Result:
CSS Position the List-item Markers
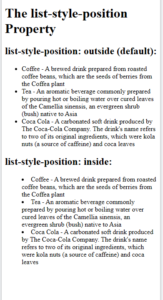
The CSS list-style-position property specifies the position of the list-item markers (bullet points).
list-style-position: outside; means that the bullet points will be outside the list item. The start of each line of a list item will be aligned vertically. This is default:
- Coffee
- Tea
- Coca-cola
list-style-position: inside; means that the bullet points will be inside the list item. As it is part of the list item, it will be part of the text and push the text at the start:
- Coffee
- Tea
- Coca-cola
Example:
|
1 2 3 4 5 6 7 8 9 10 11 12 13 14 15 16 17 18 19 20 21 22 23 24 25 26 27 28 29 30 31 32 33 |
<!DOCTYPE html> <html> <head> <style> ul.a { list-style-position: outside; } ul.b { list-style-position: inside; } </style> </head> <body> <h1>The list-style-position Property</h1> <h2>list-style-position: outside (default):</h2> <ul class="a"> <li>Coffee - A brewed drink prepared from roasted coffee beans, which are the seeds of berries from the Coffea plant</li> <li>Tea - An aromatic beverage commonly prepared by pouring hot or boiling water over cured leaves of the Camellia sinensis, an evergreen shrub (bush) native to Asia</li> <li>Coca Cola - A carbonated soft drink produced by The Coca-Cola Company. The drink's name refers to two of its original ingredients, which were kola nuts (a source of caffeine) and coca leaves</li> </ul> <h2>list-style-position: inside:</h2> <ul class="b"> <li>Coffee - A brewed drink prepared from roasted coffee beans, which are the seeds of berries from the Coffea plant</li> <li>Tea - An aromatic beverage commonly prepared by pouring hot or boiling water over cured leaves of the Camellia sinensis, an evergreen shrub (bush) native to Asia</li> <li>Coca Cola - A carbonated soft drink produced by The Coca-Cola Company. The drink's name refers to two of its original ingredients, which were kola nuts (a source of caffeine) and coca leaves</li> </ul> </body> </html> |
Result:
CSS Remove List-Item Markers
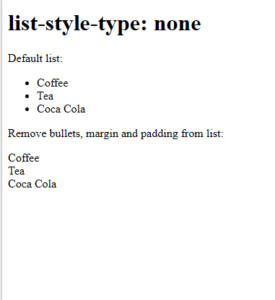
The list-style-type:none; property is used to remove the list-item markers.
Note: A list has a default margin and padding. To remove this, add margin:0 and padding:0 to the <ul> or <ol> element:
Example:
|
1 2 3 4 5 6 7 8 9 10 11 12 13 14 15 16 17 18 19 20 21 22 23 24 25 26 27 28 29 30 31 |
<!DOCTYPE html> <html> <head> <style> ul.demo { list-style-type: none; margin: 0; padding: 0; } </style> </head> <body> <h1>list-style-type: none</h1> <p>Default list:</p> <ul> <li>Coffee</li> <li>Tea</li> <li>Coca Cola</li> </ul> <p>Remove bullets, margin and padding from list:</p> <ul class="demo"> <li>Coffee</li> <li>Tea</li> <li>Coca Cola</li> </ul> </body> </html> |
Result:
CSS list-style Shorthand Property
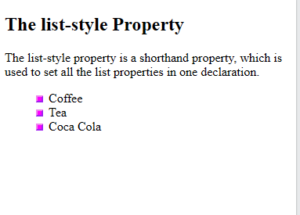
The list-style property is a shorthand property. It is used to set all the list properties in one declaration.
When using the shorthand property, the order of the property values are:
If one of the property values above is missing, the default value for the missing property will be inserted.
Example:
|
1 2 3 4 5 6 7 8 9 10 11 12 13 14 15 16 17 18 19 20 21 22 23 |
<!DOCTYPE html> <html> <head> <style> ul { list-style: square inside url("sqpurple.gif"); } </style> </head> <body> <h2>The list-style Property</h2> <p>The list-style property is a shorthand property, which is used to set all the list properties in one declaration.</p> <ul> <li>Coffee</li> <li>Tea</li> <li>Coca Cola</li> </ul> </body> </html> |
Result:
CSS Styling List With Colors
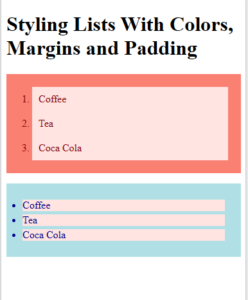
We can also style lists with colors, margins and padding, to make them look a little more interesting.
Anything added to the <ol> or <ul> tag, affects the entire list, while properties added to the <li> tag will affect the individual list items:
Example:
|
1 2 3 4 5 6 7 8 9 10 11 12 13 14 15 16 17 18 19 20 21 22 23 24 25 26 27 28 29 30 31 32 33 34 35 36 37 38 39 40 41 42 43 44 45 46 |
<!DOCTYPE html> <html> <head> <style> ol { background: salmon; padding: 20px; } ol li { background: mistyrose; color: darkred; padding: 10px; margin-left: 20px; } ul { background: powderblue; padding: 20px; } ul li { background: mistyrose; color: darkblue; margin: 5px; } </style> </head> <body> <h1>Styling Lists With Colors, Margins and Padding</h1> <ol> <li>Coffee</li> <li>Tea</li> <li>Coca Cola</li> </ol> <ul> <li>Coffee</li> <li>Tea</li> <li>Coca Cola</li> </ul> </body> </html> |
Result:
All CSS List Properties
| Property | Description |
|---|---|
| list-style | Sets all the properties for a list in one declaration |
| list-style-image | Specifies an image as the list-item marker |
| list-style-position | Specifies the position of the list-item markers (bullet points) |
| list-style-type | Specifies the type of list-item marker |
CSS Tables
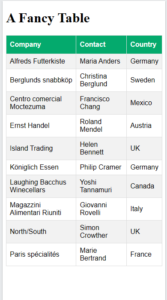
HTML tables can be greatly improved with CSS:
Example:
|
1 2 3 4 5 6 7 8 9 10 11 12 13 14 15 16 17 18 19 20 21 22 23 24 25 26 27 28 29 30 31 32 33 34 35 36 37 38 39 40 41 42 43 44 45 46 47 48 49 50 51 52 53 54 55 56 57 58 59 60 61 62 63 64 65 66 67 68 69 70 71 72 73 74 75 76 77 78 79 80 81 82 83 84 85 86 87 88 89 90 91 92 |
<!DOCTYPE html> <html> <head> <style> table { font-family: Arial, Helvetica, sans-serif; border-collapse: collapse; width: 100%; } td, th { border: 1px solid #ddd; padding: 8px; } tr:nth-child(even){background-color: #f2f2f2;} tr:hover {background-color: #ddd;} th { padding-top: 12px; padding-bottom: 12px; text-align: left; background-color: #04AA6D; color: white; } </style> </head> <body> <h1>A Fancy Table</h1> <table> <tr> <th>Company</th> <th>Contact</th> <th>Country</th> </tr> <tr> <td>Alfreds Futterkiste</td> <td>Maria Anders</td> <td>Germany</td> </tr> <tr> <td>Berglunds snabbköp</td> <td>Christina Berglund</td> <td>Sweden</td> </tr> <tr> <td>Centro comercial Moctezuma</td> <td>Francisco Chang</td> <td>Mexico</td> </tr> <tr> <td>Ernst Handel</td> <td>Roland Mendel</td> <td>Austria</td> </tr> <tr> <td>Island Trading</td> <td>Helen Bennett</td> <td>UK</td> </tr> <tr> <td>Königlich Essen</td> <td>Philip Cramer</td> <td>Germany</td> </tr> <tr> <td>Laughing Bacchus Winecellars</td> <td>Yoshi Tannamuri</td> <td>Canada</td> </tr> <tr> <td>Magazzini Alimentari Riuniti</td> <td>Giovanni Rovelli</td> <td>Italy</td> </tr> <tr> <td>North/South</td> <td>Simon Crowther</td> <td>UK</td> </tr> <tr> <td>Paris spécialités</td> <td>Marie Bertrand</td> <td>France</td> </tr> </table> </body> </html> |
Result:
CSS Table Borders
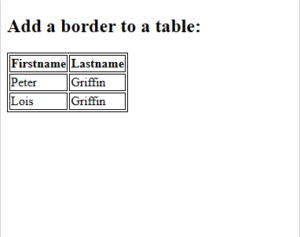
The CSS border property is used to specify the width, style, and color of table borders.
The border property is a shorthand property for:
border-width– sets the width of the borderborder-style– sets the style of the border (required)border-color– sets the color of the border
The example below specifies a 1px solid border for <table>, <th>, and <td> elements:
| Firstname | Lastname |
|---|---|
| Peter | Griffin |
| Lois | Griffin |
Example:
|
1 2 3 4 5 6 7 8 9 10 11 12 13 14 15 16 17 18 19 20 21 22 23 24 25 26 27 28 29 30 |
<!DOCTYPE html> <html> <head> <style> table, th, td { border: 1px solid; } </style> </head> <body> <h2>Add a border to a table:</h2> <table> <tr> <th>Firstname</th> <th>Lastname</th> </tr> <tr> <td>Peter</td> <td>Griffin</td> </tr> <tr> <td>Lois</td> <td>Griffin</td> </tr> </table> </body> </html> |
Result:
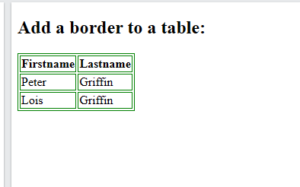
CSS Table Border Color
The example below specifies a 1px solid green border for <table>, <th>, and <td> elements:
| Firstname | Lastname |
|---|---|
| Peter | Griffin |
| Lois | Griffin |
Example:
|
1 2 3 4 5 6 7 8 9 10 11 12 13 14 15 16 17 18 19 20 21 22 23 24 25 26 27 28 29 30 |
<!DOCTYPE html> <html> <head> <style> table, th, td { border: 1px solid green; } </style> </head> <body> <h2>Add a border to a table:</h2> <table> <tr> <th>Firstname</th> <th>Lastname</th> </tr> <tr> <td>Peter</td> <td>Griffin</td> </tr> <tr> <td>Lois</td> <td>Griffin</td> </tr> </table> </body> </html> |
Result:
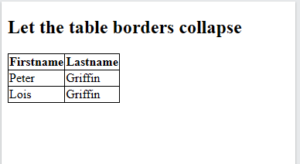
CSS Collapse Table Borders
The CSS border-collapse property sets whether table borders should collapse into a single border or be separated as in standard HTML.
This property can have one of the following values:
separate– Default value. Borders are separated; each cell will display its own borderscollapse– Borders are collapsed into a single border when possible
The following table has collapsed borders:
| Firstname | Lastname |
|---|---|
| Peter | Griffin |
| Lois | Griffin |
Example:
|
1 2 3 4 5 6 7 8 9 10 11 12 13 14 15 16 17 18 19 20 21 22 23 24 25 26 27 28 29 30 31 32 33 34 |
<!DOCTYPE html> <html> <head> <style> table, td, th { border: 1px solid; } table { border-collapse: collapse; } </style> </head> <body> <h2>Let the table borders collapse</h2> <table> <tr> <th>Firstname</th> <th>Lastname</th> </tr> <tr> <td>Peter</td> <td>Griffin</td> </tr> <tr> <td>Lois</td> <td>Griffin</td> </tr> </table> </body> </html> |
Result:
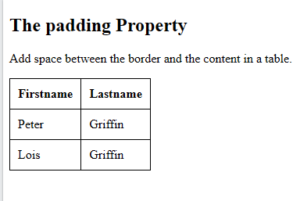
CSS Table Padding
To control the space between the border and the content in a table, use the padding property on <td> and <th> elements:
| First Name | Last Name | Savings |
|---|---|---|
| Peter | Griffin | $100 |
| Lois | Griffin | $150 |
| Joe | Swanson | $300 |
Example:
|
1 2 3 4 5 6 7 8 9 10 11 12 13 14 15 16 17 18 19 20 21 22 23 24 25 26 27 28 29 30 31 32 33 34 35 36 37 |
<!DOCTYPE html> <html> <head> <style> table, td, th { border: 1px solid; padding: 10px; } table { border-collapse: collapse; } </style> </head> <body> <h2>The padding Property</h2> <p>Add space between the border and the content in a table.</p> <table> <tr> <th>Firstname</th> <th>Lastname</th> </tr> <tr> <td>Peter</td> <td>Griffin</td> </tr> <tr> <td>Lois</td> <td>Griffin</td> </tr> </table> </body> </html> |
Result:
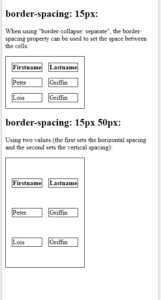
CSS Border Spacing
The CSS border-spacing property sets the distance between the borders of adjacent cells.
Note: This property works only when border-collapse is set to “separate”.
The following table has a border-spacing of 15px:
| Firstname | Lastname |
|---|---|
| Peter | Griffin |
| Lois | Griffin |
Example:
|
1 2 3 4 5 6 7 8 9 10 11 12 13 14 15 16 17 18 19 20 21 22 23 24 25 26 27 28 29 30 31 32 33 34 35 36 37 38 39 40 41 42 43 44 45 46 47 48 49 50 51 52 53 54 55 56 57 |
<!DOCTYPE html> <html> <head> <style> table, td, th { border: 1px solid black; } #table1 { border-collapse: separate; border-spacing: 15px; } #table2 { border-collapse: separate; border-spacing: 15px 50px; } </style> </head> <body> <h2>border-spacing: 15px:</h2> <p>When using "border-collapse: separate", the border-spacing property can be used to set the space between the cells:</p> <table id="table1"> <tr> <th>Firstname</th> <th>Lastname</th> </tr> <tr> <td>Peter</td> <td>Griffin</td> </tr> <tr> <td>Lois</td> <td>Griffin</td> </tr> </table> <h2>border-spacing: 15px 50px:</h2> <p>Using two values (the first sets the horizontal spacing and the second sets the vertical spacing):</p> <table id="table2"> <tr> <th>Firstname</th> <th>Lastname</th> </tr> <tr> <td>Peter</td> <td>Griffin</td> </tr> <tr> <td>Lois</td> <td>Griffin</td> </tr> </table> </body> </html> |
Result:
CSS Outside Table Borders
If you just want a border around the table (not inside), you specify the border property only for the <table> element:
| Firstname | Lastname |
|---|---|
| Peter | Griffin |
| Lois | Griffin |
|
1 2 3 4 5 6 7 8 9 10 11 12 13 14 15 16 17 18 19 20 21 22 23 24 25 26 27 28 29 30 |
<!DOCTYPE html> <html> <head> <style> table { border: 1px solid; } </style> </head> <body> <h2>Single Border Around The Table</h2> <table> <tr> <th>Firstname</th> <th>Lastname</th> </tr> <tr> <td>Peter</td> <td>Griffin</td> </tr> <tr> <td>Lois</td> <td>Griffin</td> </tr> </table> </body> </html> |
Result:
CSS Table Size (Width and Height)
CSS Table Width
The CSS width property is used to set the width of a table.
The width can be set:
- in percent (%)
- as a fixed length (px)
- by the
autokeyword
CSS Table Width in Percent
To create a table that spans the entire screen (full-width), use width: 100%:
| Firstname | Lastname | Savings |
|---|---|---|
| Peter | Griffin | $100 |
| Lois | Griffin | $150 |
| Joe | Swanson | $300 |
|
1 |
|
1 2 3 4 5 6 7 8 9 10 11 12 13 14 15 16 17 18 19 20 21 22 23 24 25 26 27 28 29 30 31 32 33 34 35 36 37 38 39 40 41 42 43 44 45 46 47 48 |
<!DOCTYPE html> <html> <head> <style> table, td, th { border: 1px solid black; } table { border-collapse: collapse; width: 100%; } </style> </head> <body> <h2>Set Table Width to 100%</h2> <table> <tr> <th>Firstname</th> <th>Lastname</th> <th>Savings</th> </tr> <tr> <td>Peter</td> <td>Griffin</td> <td>$100</td> </tr> <tr> <td>Lois</td> <td>Griffin</td> <td>$150</td> </tr> <tr> <td>Joe</td> <td>Swanson</td> <td>$300</td> </tr> <tr> <td>Cleveland</td> <td>Brown</td> <td>$250</td> </tr> </table> </body> </html> |
Result:
CSS Table Width in a Fixed Width
To create a table with a fixed width, use width: 500px:
| Firstname | Lastname | Savings |
|---|---|---|
| Peter | Griffin | $100 |
| Lois | Griffin | $150 |
| Joe | Swanson | $300 |
Example:
|
1 2 3 4 5 6 7 8 9 10 11 12 13 14 15 16 17 18 19 20 21 22 23 24 25 26 27 28 29 30 31 32 33 34 35 36 37 38 39 40 41 42 43 44 45 46 47 48 |
<!DOCTYPE html> <html> <head> <style> table, td, th { border: 1px solid black; } table { border-collapse: collapse; width: 500px; } </style> </head> <body> <h2>Set Table Width to 500px</h2> <table> <tr> <th>Firstname</th> <th>Lastname</th> <th>Savings</th> </tr> <tr> <td>Peter</td> <td>Griffin</td> <td>$100</td> </tr> <tr> <td>Lois</td> <td>Griffin</td> <td>$150</td> </tr> <tr> <td>Joe</td> <td>Swanson</td> <td>$300</td> </tr> <tr> <td>Cleveland</td> <td>Brown</td> <td>$250</td> </tr> </table> </body> </html> |
Result:
CSS Table Height
The CSS height property is used to set the height of a table.
The height can be set:
- in percent (%)
- as a fixed length (px)
- by the
autokeyword
The example below sets the height of the table headers (<th>) to 70px:
| Firstname | Lastname | Savings |
|---|---|---|
| Peter | Griffin | $100 |
| Lois | Griffin | $150 |
| Joe | Swanson | $300 |
Example:
|
1 2 3 4 5 6 7 8 9 10 11 12 13 14 15 16 17 18 19 20 21 22 23 24 25 26 27 28 29 30 31 32 33 34 35 36 37 38 39 40 41 42 43 44 45 46 47 48 49 50 51 52 |
<!DOCTYPE html> <html> <head> <style> table, td, th { border: 1px solid black; } table { border-collapse: collapse; width: 100%; } th { height: 70px; } </style> </head> <body> <h2>Set height of Table headers</h2> <table> <tr> <th>Firstname</th> <th>Lastname</th> <th>Savings</th> </tr> <tr> <td>Peter</td> <td>Griffin</td> <td>$100</td> </tr> <tr> <td>Lois</td> <td>Griffin</td> <td>$150</td> </tr> <tr> <td>Joe</td> <td>Swanson</td> <td>$300</td> </tr> <tr> <td>Cleveland</td> <td>Brown</td> <td>$250</td> </tr> </table> </body> </html> |
Result:
CSS Table Alignment
Horizontal Alignment
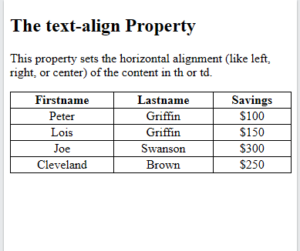
The CSS text-align property is used to set the horizontal alignment of the content in <th> or <td>.
This property can have one of the following values:
left– Aligns the text to the leftright– Aligns the text to the rightcenter– Centers the text
Note: By default, the content of <th> elements are center-aligned and the content of <td> elements are left-aligned!
CSS text-align: center
To center-align the content of <td> elements, use text-align: center:
| Firstname | Lastname | Savings |
|---|---|---|
| Peter | Griffin | $100 |
| Lois | Griffin | $150 |
| Joe | Swanson | $300 |
Example:
|
1 2 3 4 5 6 7 8 9 10 11 12 13 14 15 16 17 18 19 20 21 22 23 24 25 26 27 28 29 30 31 32 33 34 35 36 37 38 39 40 41 42 43 44 45 46 47 48 49 50 51 52 53 54 |
<!DOCTYPE html> <html> <head> <style> table, td, th { border: 1px solid black; } table { border-collapse: collapse; width: 100%; } td { text-align: center; } </style> </head> <body> <h2>The text-align Property</h2> <p>This property sets the horizontal alignment (like left, right, or center) of the content in th or td.</p> <table> <tr> <th>Firstname</th> <th>Lastname</th> <th>Savings</th> </tr> <tr> <td>Peter</td> <td>Griffin</td> <td>$100</td> </tr> <tr> <td>Lois</td> <td>Griffin</td> <td>$150</td> </tr> <tr> <td>Joe</td> <td>Swanson</td> <td>$300</td> </tr> <tr> <td>Cleveland</td> <td>Brown</td> <td>$250</td> </tr> </table> </body> </html> |
Result:
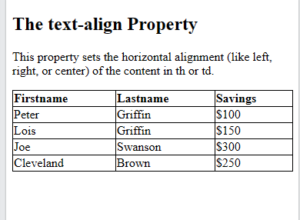
CSS text-align: left
To force the content of <th> elements to be left-aligned, use text-align: left on <th> elements:
| Firstname | Lastname | Savings |
|---|---|---|
| Peter | Griffin | $100 |
| Lois | Griffin | $150 |
| Joe | Swanson | $300 |
Example:
|
1 2 3 4 5 6 7 8 9 10 11 12 13 14 15 16 17 18 19 20 21 22 23 24 25 26 27 28 29 30 31 32 33 34 35 36 37 38 39 40 41 42 43 44 45 46 47 48 49 50 51 52 53 54 |
<!DOCTYPE html> <html> <head> <style> table, td, th { border: 1px solid black; } table { border-collapse: collapse; width: 100%; } th { text-align: left; } </style> </head> <body> <h2>The text-align Property</h2> <p>This property sets the horizontal alignment (like left, right, or center) of the content in th or td.</p> <table> <tr> <th>Firstname</th> <th>Lastname</th> <th>Savings</th> </tr> <tr> <td>Peter</td> <td>Griffin</td> <td>$100</td> </tr> <tr> <td>Lois</td> <td>Griffin</td> <td>$150</td> </tr> <tr> <td>Joe</td> <td>Swanson</td> <td>$300</td> </tr> <tr> <td>Cleveland</td> <td>Brown</td> <td>$250</td> </tr> </table> </body> </html> |
Result:
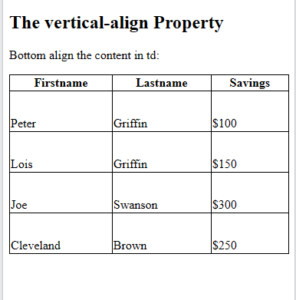
Vertical Alignment
The CSS vertical-align property sets the vertical alignment (like top, bottom, or middle) of the content in <th> or <td>.
Note: By default, the vertical alignment of the content in a table is middle (for both <th> and <td> elements).
The following example sets the vertical text alignment to bottom for <td> elements:
| Firstname | Lastname | Savings |
|---|---|---|
| Peter | Griffin | $100 |
| Lois | Griffin | $150 |
| Joe | Swanson | $300 |
Example:
|
1 2 3 4 5 6 7 8 9 10 11 12 13 14 15 16 17 18 19 20 21 22 23 24 25 26 27 28 29 30 31 32 33 34 35 36 37 38 39 40 41 42 43 44 45 46 47 48 49 50 51 52 53 54 55 |
<!DOCTYPE html> <html> <head> <style> table, td, th { border: 1px solid black; } table { border-collapse: collapse; width: 100%; } td { height: 50px; vertical-align: bottom; } </style> </head> <body> <h2>The vertical-align Property</h2> <p>Bottom align the content in td:</p> <table> <tr> <th>Firstname</th> <th>Lastname</th> <th>Savings</th> </tr> <tr> <td>Peter</td> <td>Griffin</td> <td>$100</td> </tr> <tr> <td>Lois</td> <td>Griffin</td> <td>$150</td> </tr> <tr> <td>Joe</td> <td>Swanson</td> <td>$300</td> </tr> <tr> <td>Cleveland</td> <td>Brown</td> <td>$250</td> </tr> </table> </body> </html> |
Result:
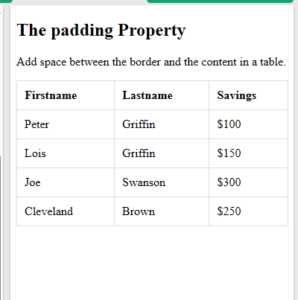
CSS Table Styling
CSS Table Padding
To add some more space between the inner borders and the content in a table, use the padding property on <td> and <th> elements:
| First Name | Last Name | Savings |
|---|---|---|
| Peter | Griffin | $100 |
| Lois | Griffin | $150 |
| Joe | Swanson | $300 |
Example:
|
1 2 3 4 5 6 7 8 9 10 11 12 13 14 15 16 17 18 19 20 21 22 23 24 25 26 27 28 29 30 31 32 33 34 35 36 37 38 39 40 41 42 43 44 45 46 47 48 49 50 51 52 53 54 55 |
<!DOCTYPE html> <html> <head> <style> table, td, th { border: 1px solid #ddd; text-align: left; } table { border-collapse: collapse; width: 100%; } th, td { padding: 10px; } </style> </head> <body> <h2>The padding Property</h2> <p>Add space between the border and the content in a table.</p> <table> <tr> <th>Firstname</th> <th>Lastname</th> <th>Savings</th> </tr> <tr> <td>Peter</td> <td>Griffin</td> <td>$100</td> </tr> <tr> <td>Lois</td> <td>Griffin</td> <td>$150</td> </tr> <tr> <td>Joe</td> <td>Swanson</td> <td>$300</td> </tr> <tr> <td>Cleveland</td> <td>Brown</td> <td>$250</td> </tr> </table> </body> </html> |
Result:
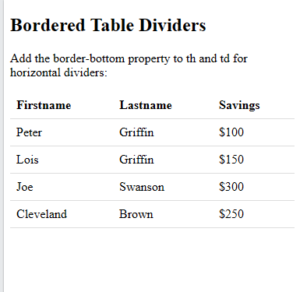
CSS Horizontal Dividers
To create horizontal dividers for a table, add the border-bottom property to <th> and <td> elements:
| First Name | Last Name | Savings |
|---|---|---|
| Peter | Griffin | $100 |
| Lois | Griffin | $150 |
| Joe | Swanson | $300 |
Example:
|
1 2 3 4 5 6 7 8 9 10 11 12 13 14 15 16 17 18 19 20 21 22 23 24 25 26 27 28 29 30 31 32 33 34 35 36 37 38 39 40 41 42 43 44 45 46 47 48 49 50 51 |
<!DOCTYPE html> <html> <head> <style> table { border-collapse: collapse; width: 100%; } th, td { padding: 8px; text-align: left; border-bottom: 1px solid #ddd; } </style> </head> <body> <h2>Bordered Table Dividers</h2> <p>Add the border-bottom property to th and td for horizontal dividers:</p> <table> <tr> <th>Firstname</th> <th>Lastname</th> <th>Savings</th> </tr> <tr> <td>Peter</td> <td>Griffin</td> <td>$100</td> </tr> <tr> <td>Lois</td> <td>Griffin</td> <td>$150</td> </tr> <tr> <td>Joe</td> <td>Swanson</td> <td>$300</td> </tr> <tr> <td>Cleveland</td> <td>Brown</td> <td>$250</td> </tr> </table> </body> </html> |
Result:
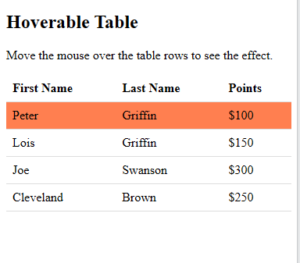
CSS Hoverable Table
Use the CSS :hover selector on <tr> to highlight table rows on mouse over:
| First Name | Last Name | Savings |
|---|---|---|
| Peter | Griffin | $100 |
| Lois | Griffin | $150 |
| Joe | Swanson | $300 |
Example:
|
1 2 3 4 5 6 7 8 9 10 11 12 13 14 15 16 17 18 19 20 21 22 23 24 25 26 27 28 29 30 31 32 33 34 35 36 37 38 39 40 41 42 43 44 45 46 47 48 49 50 51 52 53 54 |
<!DOCTYPE html> <html> <head> <style> table { border-collapse: collapse; width: 100%; } th, td { padding: 8px; text-align: left; border-bottom: 1px solid #ddd; } tr:hover {background-color: coral;} </style> </head> <body> <h2>Hoverable Table</h2> <p>Move the mouse over the table rows to see the effect.</p> <table> <tr> <th>First Name</th> <th>Last Name</th> <th>Points</th> </tr> <tr> <td>Peter</td> <td>Griffin</td> <td>$100</td> </tr> <tr> <td>Lois</td> <td>Griffin</td> <td>$150</td> </tr> <tr> <td>Joe</td> <td>Swanson</td> <td>$300</td> </tr> <tr> <td>Cleveland</td> <td>Brown</td> <td>$250</td> </tr> </table> </body> </html> |
Result:
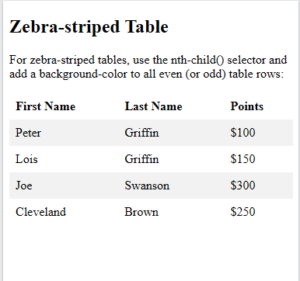
CSS Zebra-striped Table
For zebra-striped tables, use the nth-child() selector and add a background-color to all even (or odd) table rows:
| First Name | Last Name | Savings |
|---|---|---|
| Peter | Griffin | $100 |
| Lois | Griffin | $150 |
| Joe | Swanson | $300 |
Example:
|
1 2 3 4 5 6 7 8 9 10 11 12 13 14 15 16 17 18 19 20 21 22 23 24 25 26 27 28 29 30 31 32 33 34 35 36 37 38 39 40 41 42 43 44 45 46 47 48 49 50 51 52 53 |
<!DOCTYPE html> <html> <head> <style> table { border-collapse: collapse; width: 100%; } th, td { text-align: left; padding: 8px; } tr:nth-child(even) {background-color: #f2f2f2;} </style> </head> <body> <h2>Zebra-striped Table</h2> <p>For zebra-striped tables, use the nth-child() selector and add a background-color to all even (or odd) table rows:</p> <table> <tr> <th>First Name</th> <th>Last Name</th> <th>Points</th> </tr> <tr> <td>Peter</td> <td>Griffin</td> <td>$100</td> </tr> <tr> <td>Lois</td> <td>Griffin</td> <td>$150</td> </tr> <tr> <td>Joe</td> <td>Swanson</td> <td>$300</td> </tr> <tr> <td>Cleveland</td> <td>Brown</td> <td>$250</td> </tr> </table> </body> </html> |
Result:
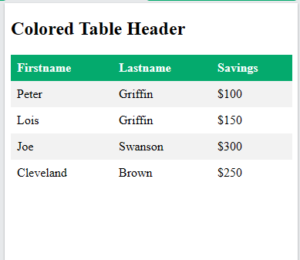
CSS Table Color
The example below specifies a background color and a text color for the <th> elements:
| First Name | Last Name | Savings |
|---|---|---|
| Peter | Griffin | $100 |
| Lois | Griffin | $150 |
| Joe | Swanson | $300 |
Example:
|
1 2 3 4 5 6 7 8 9 10 11 12 13 14 15 16 17 18 19 20 21 22 23 24 25 26 27 28 29 30 31 32 33 34 35 36 37 38 39 40 41 42 43 44 45 46 47 48 49 50 51 52 53 54 55 56 |
<!DOCTYPE html> <html> <head> <style> table { border-collapse: collapse; width: 100%; } th, td { text-align: left; padding: 8px; } tr:nth-child(even){background-color: #f2f2f2} th { background-color: #04AA6D; color: white; } </style> </head> <body> <h2>Colored Table Header</h2> <table> <tr> <th>Firstname</th> <th>Lastname</th> <th>Savings</th> </tr> <tr> <td>Peter</td> <td>Griffin</td> <td>$100</td> </tr> <tr> <td>Lois</td> <td>Griffin</td> <td>$150</td> </tr> <tr> <td>Joe</td> <td>Swanson</td> <td>$300</td> </tr> <tr> <td>Cleveland</td> <td>Brown</td> <td>$250</td> </tr> </table> </body> </html> |
Result:
CSS Table Properties
| Property | Description |
|---|---|
| border | Sets all the border properties in one declaration |
| border-collapse | Specifies whether or not table borders should be collapsed |
| border-spacing | Specifies the distance between the borders of adjacent cells |
| caption-side | Specifies the placement of a table caption |
| empty-cells | Specifies whether or not to display borders and background on empty cells in a table |
| table-layout | Sets the layout algorithm to be used for a table |